Monday, January 24, 2011

BumGenius aplix fix-up

Tonight's project continues with the theme of working on cloth diapering items that we need for Noob's sitter. Specifically, we need more aplix (velcro) diapers. Aplix diapers are great because they are as easy as disposables -- perfect for babysitters and other people unfamiliar with cloth diapering. We have tons of diapers, but a lot of them are prefolds or diapers with snaps, and those are more complicated. I'm trying to keep it as easy as possible!

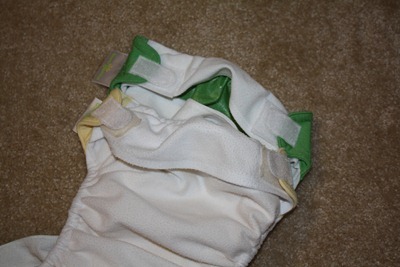
Anyway, I've mentioned previously that I got a bunch of "well loved" BumGenius 3.0 pockets a few months back for $2 each. On some of them, the velcro is so far gone that it's easier to just convert them to snaps. But a few of them appear to have salvageable front velcro. They just need the velcro tabs replaced. So that was my project for tonight:

IMG_0380

Cotton Babies sells BumGenius "refresher kits" for $1 that include new tabs, laundry tabs, and elastic. I did buy one kit, which is useful to use as a template for cutting tabs, but for these diapers, I used aplix that I had purchased from Very Baby. It's much cheaper this way -- I spent about $12 total, including shipping, and I've made a couple of complete diapers in addition to these tab replacements, and I'm not even halfway through what I bought. Although I've been unimpressed with the quality of the aplix on the diapers I've made, so I'll have to see how these new tabs hold up over time. (Note: You definitely want to purchase aplix or touchtape online. Don't use actual Velcro brand stuff purchased at Joann's, Walmart, etc. -- it's very expensive and very low quality, so it won't hold up to the rigors of diaper laundry.)

Anyway, I just stuck the hook tab that I got from Cotton Babies to some of my loop tape, and cut around it to get a new loop tab. Then I did the same with the loop tab and my hook tape. I took the newly cut tabs and "sandwiched" the stretchy tab of the diaper between them (making sure to put the hook tab going the right way!) and then pinned it down and sewed around it twice, about 1/8" from the edge. I repeated that on the other side.

The Ribbit (green) diaper had awful laundry tabs as well, so I pulled those off and sewed on some loop tape for new laundry tabs. The laundry tabs on the Butternut (yellow) one look OK, so I left them for now.

It took about an hour total to do both diapers, including cutting the new tabs (I had pulled off the original tabs previously), and now I have two more sitter-worthy diapers! Yay!

Wednesday, January 19, 2011

More cloth diapering stuff

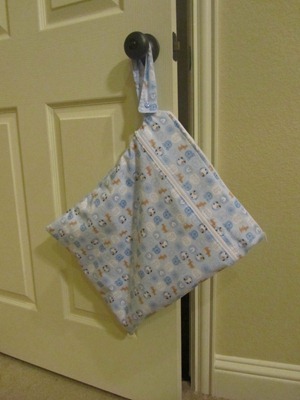
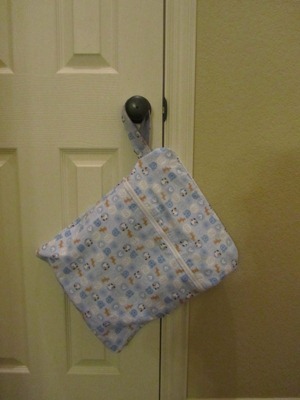
I sent the wet/dry bag that I made the other night to Noob's sitter today, and it worked well! I sewed up a second one tonight:

IMG_0282 (2)

I got both zippers going the same direction this time :) But I goofed on the handle again. I decided to make it with a layer of the printed woven cotton, backed with a layer of denim, to make it more durable. I thought I cut enough woven cotton to be able to fold it over, hiding the denim. But I didn't. So now the denim is visible on the back of the handle, and it looks a little funny. But it's not too bad, and it does make the handle feel a lot less flimsy.

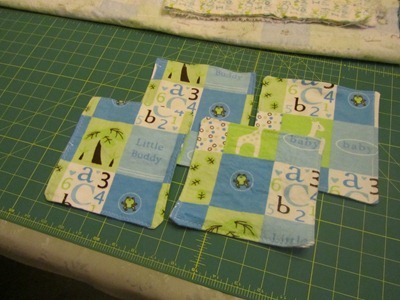
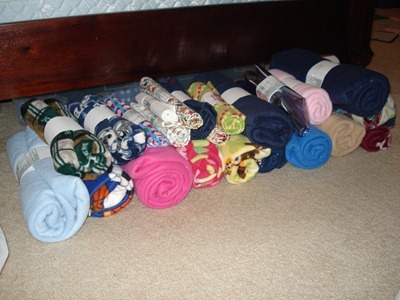
We're also sending lots of cloth wipes over to Noob's sitter, so I made some more for us to use at home:

IMG_0281 (2)

Cloth wipes are super easy. This page gives a couple of options for how to make them. I do the "Tricky" way, which is really not all that tricky. In the past, I've made wipes out of old flannel receiving blankets or t-shirts, but I got fancy this time and used a cute flannel print -- from the Joann's remnant bin, of course. They came out great!

I love cloth wipes because they save so much money. For less than $10 in materials and an afternoon's worth of work, you can easily sew up a stash of cloth wipes that will last you for years.

Monday, January 17, 2011

Wet/dry bag

IMG_0279 (2)

Hubby is back at work after paternity leave, which means that Noob is now in child care outside the home. We found a lovely woman to watch him out of her home, and she is even willing to do cloth diapers. But there are a few things that we don't need at home but we do need to send over with Noob. That means I have some sewing to do!

First up, I need to make some large wetbags. Wetbags are bags with waterproof material on the inside, so that they can hold... well, wet stuff. So they're great for transporting dirty cloth diapers. I also use them to hold wet swimsuits/towels at the pool, to hold soiled clothes when we're out, etc. They are very handy things to have around, even if you don't use cloth diapers!

I've made wetbags before, using this tutorial. The instructions look complicated, but they're pretty easy, once you get the hang of it. This time around, I wanted to add a twist. I had heard that Planet Wise's wet/dry bags are handy for sending to daycare. They have two pockets, one that is waterproof ("wet") and one that is not ("dry"). So the clean diapers go in the dry pocket in the morning, and then the dirty diapers go in the wet pocket throughout the day.

I usually use woven cotton for the outer fabric of my wetbags, because it's easy to find and reasonably priced. This particular fabric was a Joann's remnant bin steal. It was a Red Tag clearance fabric, so it was only $3 for a yard (regularly $6/yard). Then I bought it when Red Tag fabrics were on sale for 50% off, dropping it down to $1.50. Then that yard was in the remnants bin, while remnants were on sale for 75% off, so that dropped it down to just 37 cents. Like I said, a steal!

Anyway. I cut two big pieces of the printed cotton fabric, about 15"x18". I wanted the bag to be lined. I wanted to make two bags out of my yard of printed fabric, so I didn't have enough printed fabric for the lining. I grabbed an old white pillowcase and cut that up instead!

I took one of the pieces of printed fabric and one of the pieces of pillowcase, and cut them about 5" from the top, to create two pieces.

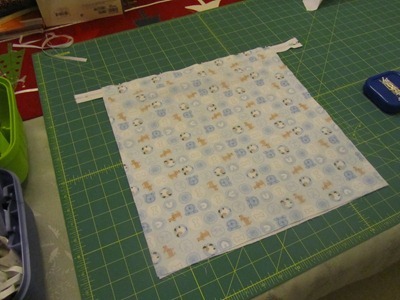
I got out my first zipper, and followed the instructions in the tutorial to attach it to the larger piece of printed fabric and pillowcase lining -- basically, steps 2-4 in that tutorial. I placed the pillowcase lining down, then placed the zipper on top facing up. I lined up the top edge of the zipper with the top edge of the lining. Finally, I put the printed fabric face down and lined up the top edge of the fabric with the top edge of the zipper.

IMG_0275

Then I sewed all the layers together, opened up the fabric, and topstitched through all layers. Very important: I always use 100% polyester thread when sewing wetbags. Thread with cotton in it will wick moisture from the inside of the bag to the outside. Not. Good.

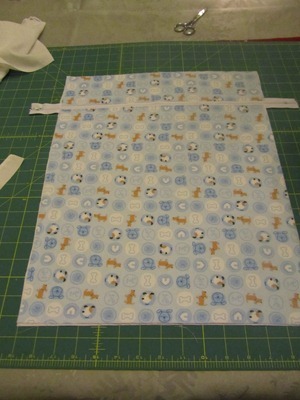
I repeated these steps to attach the smaller piece of fabric and lining to the other side of the zipper. Then I was able to open it up, like this (the lining fabric is underneath the printed pieces):

IMG_0276 (2)

I cut another piece of pillowcase that was the same size as this entire piece of fabric/zipper. I treated that entire dealio (the two pieces of fabric and lining attached to the zipper plus the large piece of lining) as one piece of fabric.

For the waterproof inner, I used PUL (polyurethane laminate), purchased at Joann's. PUL is waterproof, is very durable, and launders well. I cut two pieces of PUL, a little bigger than my pieces of fabric.

From there on out, I followed the tutorial, attaching my fabric/zipper/lining/lining piece and one piece of PUL to one side of the second zipper, then attaching the other piece of fabric and other piece of PUL to the other side of the zipper. Then I stitched around the fabric pieces to form a bag, stitched each side of the PUL (leaving the bottom open), turned the whole thing inside out, and stitched the bottom of the PUL bag closed. (See the tutorial for step-by-step directions and pictures).

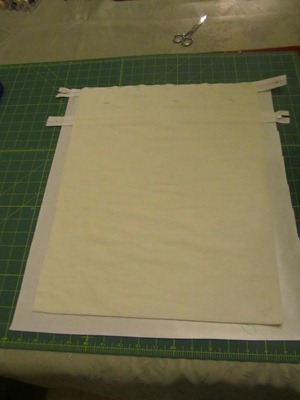
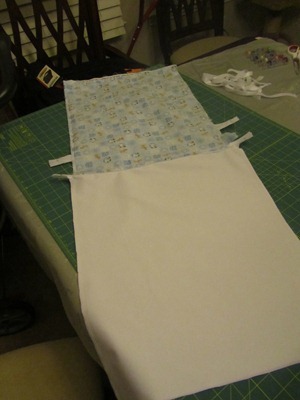
Here is the fabric/zipper/lining/lining piece on top of the PUL with the second zipper sandwiched in between. You can see that the PUL is bigger than the fabric. I find that the layers tend to shift around while I'm sewing, so making the PUL bigger gives me some wiggle room if the fabric does shift on top of the PUL:

IMG_0277 (2)

Second zipper added, fabric bag all sewed up, two sides of the PUL bag all sewed up. I had to remember to unzip both zippers part of the way prior to sewing. Otherwise, I would have sewed the zippers outside the bags! I also added a handle. You can barely see it in between the two zippers on the right side:

IMG_0278 (2)

And that's that! Oh, one last very important thing: I threw the bag in the dryer on high heat. That makes the PUL melt slightly, to seal up any holes made by the sewing machine needle, pins, etc. while sewing.

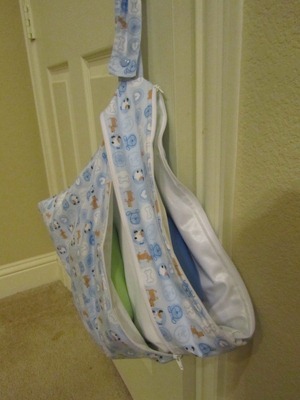
Here's a close-up of the bag in action with diapers in both pockets. You can also see the snap I added on the handle, so that it can snap around the handle of a stroller, etc.:

IMG_0280 (2)

I'm excited to send it over with Noob! I'm going to sew up more of these, so that I have 2-3 of them, since we do diaper laundry every 2-3 days and will throw these bags in with the laundry.

Next time, I think I'm going to make the handle out of a few more layers of fabric or out of webbing, so that it is more durable. This one feels really thin and flimsy, so I don't know how it's going to hold up over time. Also, I sewed the two zippers going the opposite directions :) You can see that the dry pocket zipper is at the bottom in the picture above, while the wet pocket zipper is at the top. Oh well! It should work just fine!

Final cost: 37 cents for the outer fabric, nothing for the lining (yay upcycling!), $5 for the PUL... and $2 each for the zippers! Hancock Fabrics does 50% off all zippers on occasion, and I have got to hit up that sale next time they do it, because zippers are kind of expensive. But anyway, that works out to less than $10 total for the bag, and I still have enough fabric left over to make another one. Given that the Planet Wise version is $30, I think I can live with flimsy handles and zippers that go opposite directions :)

Thursday, January 13, 2011

Remnant bin

I came down with a cold at the end of last week, and didn't feel up to sewing. Then I've been traveling on business for all of this week. So it's been a while since I've been at my machine, and I miss it :( But I'm headed home tonight and have some projects lined up to work on. In the meantime, I thought I'd do a post about some great deals I found on fabric!

I do most of my fabric shopping at Joann's, and I'm slightly obsessed with saving as much money as I possibly can there. Which is a good obsession to have, given how often I'm there and how I always seem to discover something I "neeeeeeeeeeeeed" while I'm there.

One of my favorite ways to save money at Joann's is to dig through the remnant bin. "Remnants" are small pieces of fabric, anywhere from a few inches to up to a yard or so. I'm not even entirely sure where they come from. I think sometimes they are customer-returned fabric. Other times, they're the small amount left over on the bolt after a customer requests a cut.

Especially when sewing for kids, the relatively small yardages work perfectly. To give you an idea, Hubby's pajama pants required 2.5 yards of fabric -- way more than you'd ever find in the remnant bin as continuous yardage. But I can get a pair of pajama pants for both Littles and Noob out of less than one yard of fabric. I can easily find that in the remnant bin!

Anyway, the cool thing about the remnant bin is that everything in there is 50% off. Better still, it's 50% off the current price for that type of fabric. So for example, anti-pill fleece in solid colors is usually $8.99/yard. It regularly goes on sale for 50% off, or $4.49/yard. During these sales, remnants are another 50% off, or $2.25/yard -- a savings of 75%.

For some reason, one of my nearby Joann's did 75% off remnants for all of December, rather than the usual 50%. At the same time, all types of fleece (which, as you can tell from my tag cloud, is my most-used fabric) were on sale for 50%. So that meant that solid colored anti-pill fleece was just a little over $1/yard -- a savings of nearly 90%!

I took that opportunity to stock up like crazy! Here's what I took away from two trips:

DSC09192

22 yards of fabric. Regular price: $211. What I paid: $31 :)

I love having a big stash of fabric, so that when inspiration strikes, I don't have to find time to get to the fabric store. I can just start sewing right away! I've already used the blue Cowboys fleece on the second row for the sleeves of Noob's soft shirt and the bright pink fleece just below it for the bottom of Littles' nap mat.

I thought that the 75% off deal was some sort of special sale, but it's been going on for so long now that I wonder if it's permanent. I hope so! It makes awesome deals even better!

Tuesday, January 11, 2011

The tutu fix

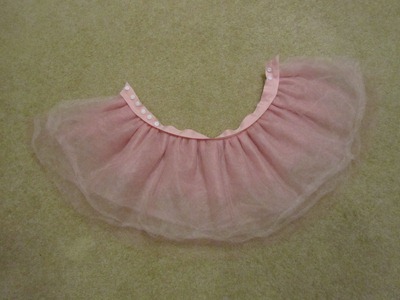
A few weeks ago, I blogged about a tutu that I made for Littles' dance class, and mentioned that the waist was a little too big. Well, I fixed it! I simply added some snaps on the waistband. This makes the tutu much more adjustable, and more secure, too:

IMG_0187

It's hard to see in this picture, but I placed the snaps right above the seamline going through the middle of the ribbon. They only go through the ribbon, not through the tulle, so they are hidden by the gathered tulle above the seamline and aren't very visible when the tutu is on.

This also addressed the problem with the old ribbon waistband where it was hard to tie it tight enough to prevent a gaping hole where the two edges of the tutu didn't quite come together. With the snaps, the two edges naturally overlap, creating a nice smooth look:

IMG_0189

Littles approves of the fix :)

IMG_0188

I love those snap pliers! They come in handy for so many projects.

Tuesday, January 4, 2011

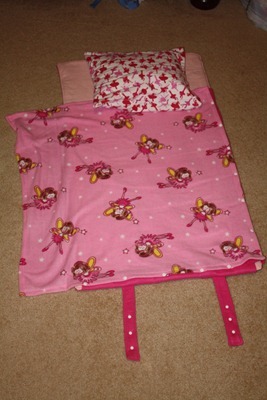
Preschool nap mat

IMG_0317

Today was Hubby's first day back at work after his paternity leave. During our respective leaves, we took Littles out of extended care at her preschool: We picked her up at the end of the school day (2 PM) and brought her home to nap. Now that we're both back at work full-time, she'll start napping at school again.

A few weeks before Noob's birth, her preschool started asking parents to provide bedding for naptime. For those last few weeks, we just sent a small travel pillow and blanket. But for her return to extended care, I decided to sew her a nap mat. She picked a ballerina theme, and I got to work.

The mat
To make the mat, I started by cutting a piece of Warm and Natural batting, sized 90" by 27". I chose this size because it will allow me to make four nap mats using one queen size package of Warm and Natural. I figure Noob will need one eventually, too!

I folded the batting in half along the short edge, so I had a double layer, sized 45" by 27".

I wanted to make the nap mat somewhat waterproof in case of an accident. So I found a big piece of PUL (polyurethane laminate) and sewed it to the batting. If you're not familiar with PUL, it's the material used for the waterproof layer of many cloth diapers. It's soft and flexible, not at all like the plastic pants of cloth diapers of yesteryear, but still very waterproof. It can be found at Joann's (utility fabrics section) or Hancock Fabrics, as well as online.

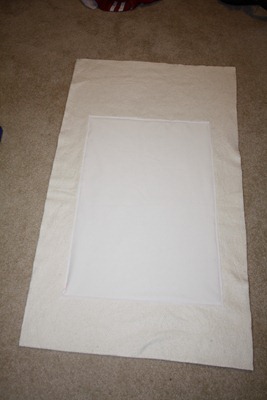
Here's the batting with the PUL piece sewed on. Most PUL has two sides, a shiny/sticky side and a soft/smooth side. The shiny/sticky side is the waterproof side, so I sewed it with the shiny/sticky side touching the batting, and the soft/smooth side up.
IMG_0296

I cut two pieces of fabric to match the size of the batting. For the top of the mat, I used an old flannel crib sheet. For the bottom of the mat, I used fleece. (Fleece repels moisture, so I'm hoping that layer also helps keep the floor dry in the event of an accident.)

To assemble the nap mat, I put the fleece wrong side down, then the flannel right side down (so the fleece and flannel had right sides together, then the batting with the PUL piece facing up.

For a basic nap mat, I could have started sewing at this point. But I wanted to add a couple of additional features.

Straps and name tag
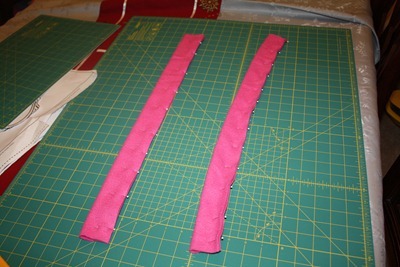
I cut two long straps out of the same fleece that I used for the bottom of the nap mat. I think they were about 4" wide by 25" long. I made them way longer than they needed to be, knowing that I could cut them down later.
IMG_0297

I folded each strap in half and sewed along the long side, making a tube. I turned the tube inside out, then topstitched each side.

I decided to make the straps snap into place, because I was too lazy to sew on velcro :) I rolled up the nap mat both with and without a pillow inside, and marked a good location for the snaps for each.

I pulled out the snap pliers that I usually use for cloth diaper snap conversions, and used them to add snap sockets in the locations I had marked. I reinforced each snap with an extra layer of fleece and a piece of interfacing, underneath the socket. This didn't look very pretty, but it didn't matter, since it wouldn't be visible on the finished mat.

In between one of the sets of snaps, I added two more snap sockets, about 3" apart, also reinforced with extra fleece and interfacing. These would be used for the name tag.

Finally, I inserted each strap into my assembled nap mat, in between the flannel and fleece, so that just a small piece of each strap stuck out.

Here is how the bottom of the mat looked when I was done. This is the "wrong" side of the fleece. You can see a little bit of the straps sticking out at the bottom.
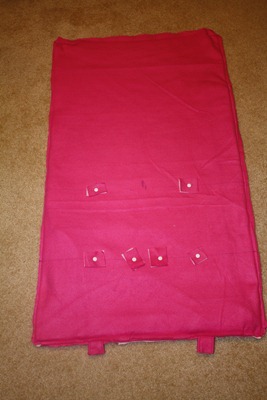
IMG_0304

Blanket
I wanted to add a built-in fleece blanket. I could have cut the blanket and sewed it into the nap mat, but instead, I decided to make it snap in, so that it could be swapped out later for a new blanket. This also gives Littles the option of pulling the blanket from the side, or pulling it up from the bottom, or both.

To accomplish this, I cut two pieces of fleece to attach the snaps to. The longer piece was about 10" by 35", and the wider piece was about 10" by 25". As it turns out, these pieces were way too wide -- I think I could have easily done just 5" wide for both.

I folded the pieces in half, then stuck them into the assembled nap mat, in between the fleece and the flannel.

Pillow
Again, I wanted to make the pillow snap in. I added two snaps towards the top of the flannel piece, about 10" apart, reinforced on the wrong side with an extra piece of flannel and a piece of interfacing.. This picture shows the snaps along with the markings I made to line them up properly:
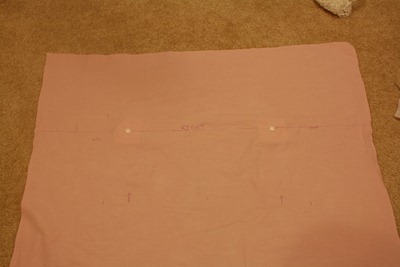
IMG_0299

Turning and topstitching
Once I had everything in place, I sewed around three of the four mat sides, leaving the short end without the straps open. Then I turned the whole thing inside out through that opening:
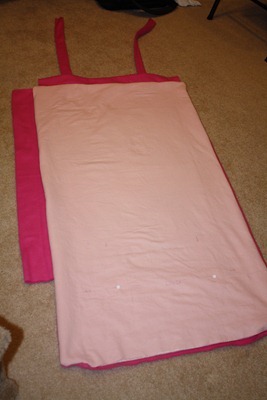
IMG_0305

I pinned the fourth side closed:

IMG_0307

And topstitched around the whole thing. This closed up that opening.

Blanket, again
I cut the blanket to come all the way up to the top of the "wing" on the long side of the nap mat. As far as width, I wanted it to be about 10" wider than the nap mat, so that it would fully cover Littles when she was lying under it. I added about 1" on each side for a hem. The final size ended up being about 36" by 36".

I hemmed the blanket all the way around to finish the edges. This is optional, since fleece doesn't fray, but it worked well to give me a double layer of fleece on the two edges that needed to snap in.

I added snaps to the bottom and one side of the blanket, about 5" apart. Then I added corresponding snaps to the two "wings."

Pillow, again
We still had the small travel pillow that we had purchased for Littles to use at naptime immediately prior to Noob's birth. We had a lot of trouble finding a small pillow of this size! I eventually found one at Joann's.

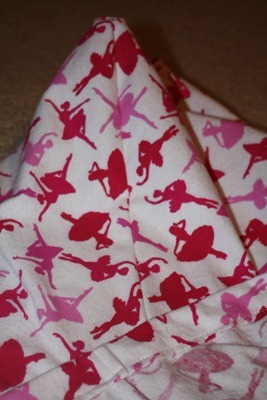
I wanted to make a pillowcase to match the ballerina theme. I found some cute ballerina flannel in the remnants bin at Joann's. It was about 27" wide. The pillow is roughly 16" by 12", so I cut a piece of flannel about 40" by 15" and folded it in half to get a piece that was 20" by 15".

Since flannel frays, I wanted to avoid unfinished seams inside the pillowcase. So I did what I think is called a French seam. Fancy! What I did was sew the two parallel open sides with the wrong sides on the inside. Then I trimmed down the seam allowance to be about 1/8". Here's how it looked:
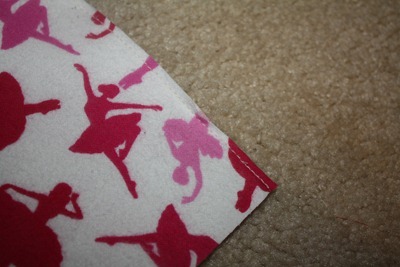
IMG_0311

I pressed the seam open. Then I turned the pillowcase inside out, and sewed again, using a 1/4" seam allowance. This enclosed the raw edge, so I had nice finished edges both inside and out.

I still had one open side. I folded it, then folded it again, and sewed it into place, creating a hem with no unfinished edges.

Here's how it looked when I was finished sewing. Nice, clean edges, both inside and out!
IMG_0316

I added some snaps to the back of the pillowcase, reinforcing with a small piece of flannel and some interfacing.

Straps, again
I rolled up the nap mat both with and without the pillow inside, and marked where my previously-added sockets hit on each strap. Hubby had the idea to add multiple sets of straps, just in case Littles' teachers want to send something home inside the nap mat, making it a little fatter than usual. Easy enough!

Once I got the snaps added, I cut the straps a few inches above the last snap. Then I folded the strap in on itself and stitched it closed to give a nice finished edge.

Name tag, again
The final touch! Noob's soft book gave me good practice for putting this together.

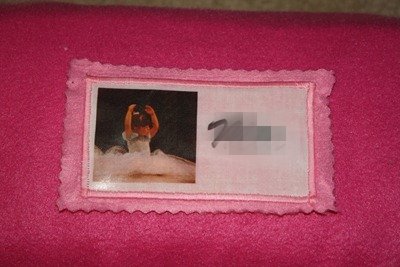
In Microsoft Publisher, I created a box about 4" by 2". I added Littles' name, along with a picture from her ballet recital last year. I printed it out on photo transfer paper, then transferred it to a piece of muslin. I added some Heat n Bond Lite on the back.

For the background, I cut a piece of fleece using a pinking blade on my rotary cutter. It was about an inch wider/taller than the muslin piece. I used a slightly different color fleece from what I used on the mat bottom.

I added two snaps to the fleece, reinforcing them with a small piece of interfacing.

I placed the muslin over the snap caps and ironed gently to fuse the muslin to the fleece.I did a satin stitch all the way around the muslin to secure it to the fleece.

Finally, I snapped it into place on the outside of the nap mat.
IMG_0325

Some parting shots!

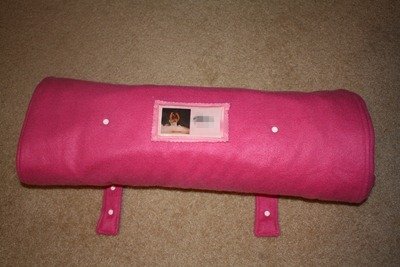
Rolled up, name tag visible:
IMG_0324

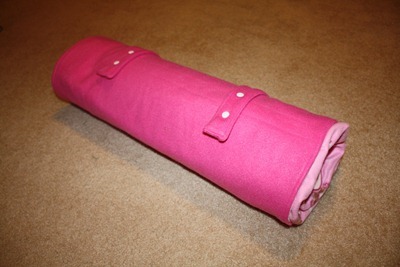
Snapped closed for transit:
IMG_0321

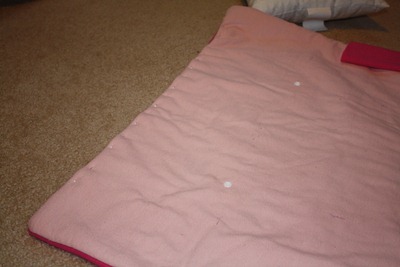
Unrolled:
IMG_0319

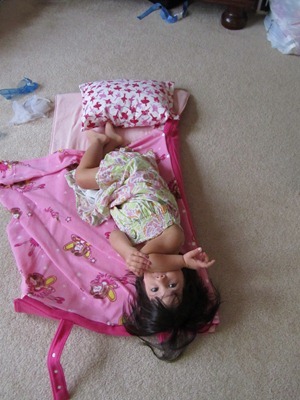
Action shot... Littles refused to lie on it properly. Oh well!
IMG_0184

So that's how I did it! Despite all the steps, it was really fairly easy to put together. Good thing, too, because I don't know how much napping Littles will actually do on this :) These past few weeks, while she's been home on Christmas break, she's only napped maybe one or two times a week. And I'm sure that once she's back in extended care, she'll be more interested in playing with her friends than napping! Oh well. This mat will work well for overnight visits to see friends and grandparents, so I think we'll get some use out of it that way, even if it doesn't get used much as school!
Sunday, January 2, 2011

Soft shirts

About this time last year, when I sewed my first few pairs of fleece PJ pants for Littles, I had to figure out a way to make matching shirts. I had the idea to take plain t-shirts and embellish them appropriately, but I couldn't find reasonably priced long-sleeve t-shirts, and it didn't make sense to pair those nice warm fleece PJ pants with a short-sleeve shirt.

One night, I got the idea to make a long-sleeve shirt by sewing fleece "sleeves" onto a short sleeve shirt. The result...

Photobucket

Cute? Hideous? I'm still not entirely sure. But certainly, these shirts were fast and easy to make, cheap (I used leftover fleece scraps and standard Hanes boys underwear shirts, which I bought at Wal-mart for around $6 for a 5-pack), and very soft and warm!
I ended up making three shirts in this way last winter. We pulled them out again a few months ago as the weather started to cool off, and Littles has worn one of them just about every night since. A few nights ago, they were all in the wash, and Littles was very upset begging for a "soft shirt." We tried giving her some other shirts that are soft, but no, no. She wanted a cute/hideous fleece-sleeved "soft shirt."

So I got to work. And I took pictures this time to show how I put these together.

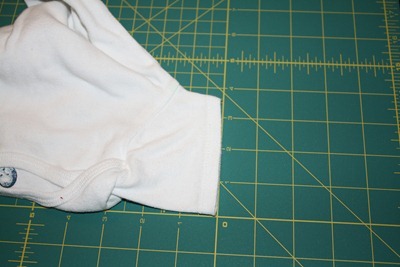
I start by taking a few key measurements. First, I need to know what length the sleeves must be. I do this by measuring an existing shirt -- or, in this case, one of Noob's onesies. It's about 7" from the shoulder seam to the cuff.

IMG_0209

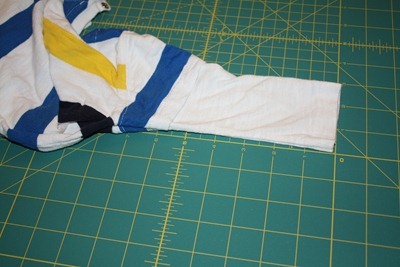
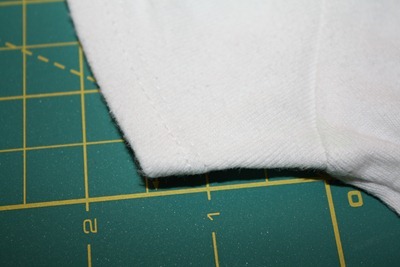
Since the sleeves of the short sleeve shirt will stay somewhat intact, I need to get some measurements from it, too. This is hard to see, but it's the sleeve of the short sleeve shirt. It's about 1.5" from shoulder seam to cuff, and the hem is about 0.5".

IMG_0213

Now I can calculate how long my fleece sleeves have to be. They must be (total sleeve length) - (short sleeve shirt's shoulder seam to cuff length) + (short sleeve shirt's hem length * 2) + (desired hem length for fleece sleeve). Here, that was 7" - 1.5" + 0.5" *2 + 1" = 7.5"

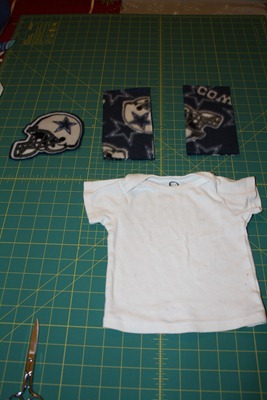
As for how wide, the fleece sleeve needs to match the width of the short sleeve shirt's sleeve, so I need to measure that. Here, it's about 3.5". I'm going to use a 0.25" seam allowance, so that means that the fleece sleeve needs to be 3.5" * 2 + 0.5" = 7.5" wide.

IMG_0210

So I cut two pieces of fleece with those dimensions. I folded each piece in half to create a tube.

I also prepared an embellishment. This shirt will go along with Noob's Dallas Cowboys PJ pants, so I cut a Cowboys helmet out of some fleece. (The same thing I used to embellish his sleep sack.) I've also used t-shirt transfers in the past, but they get all cracked and yucky-looking over time. Fleece is much more durable.

The shirt is a Gerber size 18 months shirt. Gerber stuff runs really small, so Noob has been wearing this since he was about 3 months old. I got it at a thrift store for about 50 cents. I've been looking and looking for plain white short-sleeve infant shirts like this in regular stores, but I haven't found any! Too bad. They are so versatile.

IMG_0214

I started by sewing the helmet on to the front of the t-shirt. Then I started to work on the sleeves.

I folded the fleece in half, right sides together, and sewed up the open side. Fleece is much stretchier in one direction, so I made sure that the stretchiness was going across the width of the sleeve. That is, the open ends of the fleece tubes stretch more than the side I sewed up.

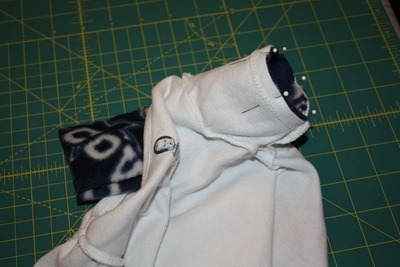
I turned the tube/sleeve right side out and the t-shirt inside out. I inserted the fleece into the t-shirt sleeve, right side to right side, and pinned it into place:

IMG_0216

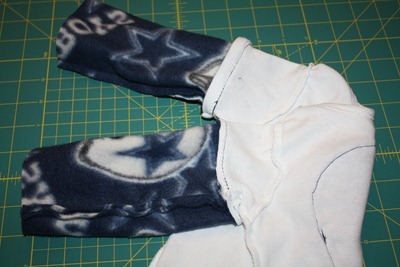
Then I sewed the sleeve into place. I think it looks best to sew right around the original seam line on the shirt sleeve. That way, you don't see the original hem line just above the new seam when you're done.

Here are both sleeves finished. You can see the navy blue thread that I used, right near the original seam line. On the bottom sleeve, I've also trimmed the seam allowance:

IMG_0217

Then I hemmed the bottoms of the sleeves. You could actually leave the raw edges if you wanted; fleece doesn't fray.

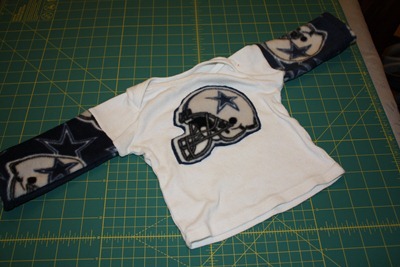
All done!

IMG_0218

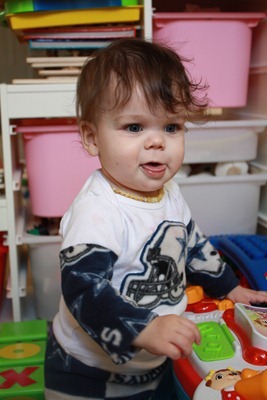
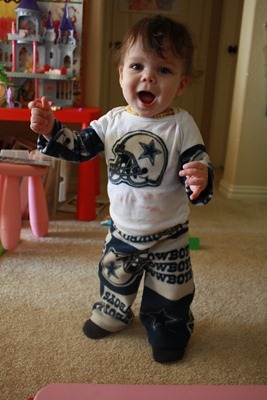
Here's how it looks! (Please ignore the strawberry yogurt all over the front. I should have done the photo session before breakfast.)

IMG_0292

IMG_0280

(Yes, he's wearing his Mini Mocs. They go well with these PJs!)

Here is Littles modeling another "soft shirt."

IMG_0186

I got the t-shirt for this one through a co-op that I'm part of. The co-op organizer found an amazing deal on toddler t-shirts -- it worked out to be about $1.50 a shirt including shipping and everything, so basically the same cost as the underwear shirts at Wal-mart. But these shirts are much higher quality and come in colors. I had this yellow shirt in mind specifically to match these yellow Pooh PJ pants. I also picked up a bunch of pink and blue shirts so that I have them on hand for future projects!

IMG_0197

(Yes, those are Mini Mocs on her feet, too! That's a pair that I made a while ago. They are made entirely out of pink fleece, no other materials.)

Littles loves her new "soft shirts." I'll probably make more of these before winter is through!

Saturday, January 1, 2011

More Mini Mocs: Soft soled shoes


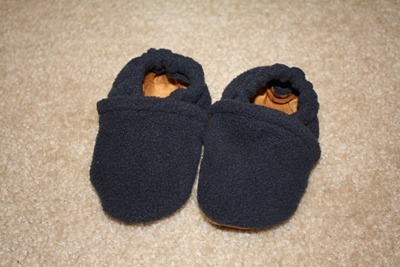
Noob took his first steps about two weeks ago and is now toddling all over the place. He does really well in the playroom upstairs, which is carpeted, but he was having a lot of trouble walking downstairs, on our hardwood floors. Socks or pajama bottoms are just too slippery, and since it's chilly in our house these days, I hate to see him walking around barefoot. So I used the Sew Darling Mini Mocs pattern (the same one I used for Littles' Silvermist slippers) to sew a pair of soft soled shoes for him.

IMG_0220

As with Littles' slippers, I cut the pattern a little bit wider -- Noob hasn't gotten fitted for real shoes yet, but from working with this pattern, it looks like he has also inherited his daddy's wide feet. I used the 6-12 month length but the 12-18 month width.

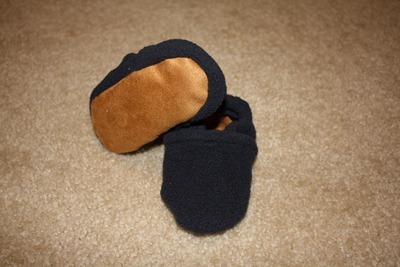
I made this pair out of scrap fleece (left over from sewing his sleep sack) for the tops and faux suede for the soles. The "suede" is actually 100% polyester, from Joann's home décor section. I often see small pieces of it in the remnants bin, which works well, because you don't need much of it to make these shoes. It comes in all sorts of different colors. It is not very thick, so I don't think it would work well for outdoor use, but it's great around the house. It does fray, and the pattern leaves unfinished edges, so I'll have to see if it holds up OK over time. But if it doesn't, I'll just sew another pair of shoes :)

IMG_0221

I suppose I could have used the same anti-slip sole fabric that I used on the soles of the Silvermist slippers, but I wanted these to look less like slippers and more like real shoes.

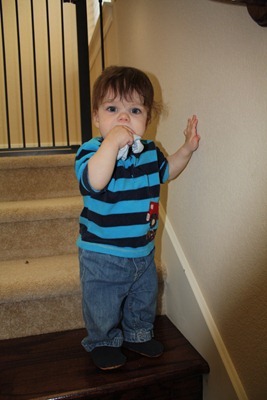
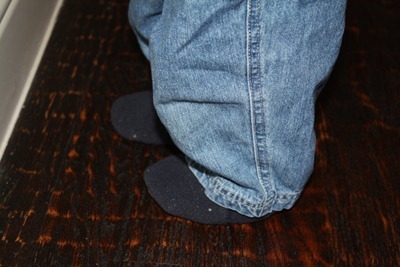
Here are some action shots! You can see our hardwood floors in the pictures. The shoes do a great job of staying put on Noob's feet and keeping him from sliding around on the floor.

IMG_0256

IMG_0250

IMG_0262

I'm definitely going to sew some more pairs of these for Noob to wear this winter, including some with real leather soles for more heavy-duty usage.