Friday, December 31, 2010

Silvermist slippers

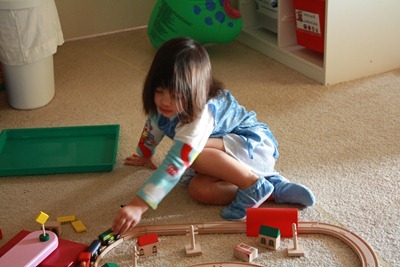
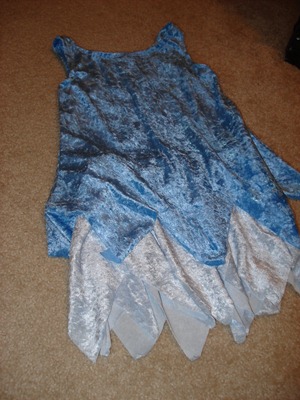
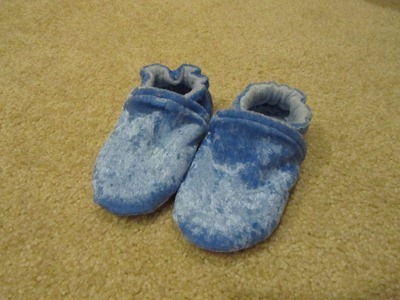
After receiving her Silvermist costume for Christmas, Littles wore it for three days straight. On Day 2, she developed a nasty cold, and I felt so bad for her walking around the chilly house in bare arms/legs/feet (because, of course, she refused to wear anything but the costume) that I decided to at least do something about the feet.

So I pulled out the Sew Darling Mini Mocs pattern. I've sewed this pattern up a few times before and I love it! If you're familiar with Robeez soft soled shoes, Mini Mocs come out looking very similar. They are super easy to sew and the pattern is free!

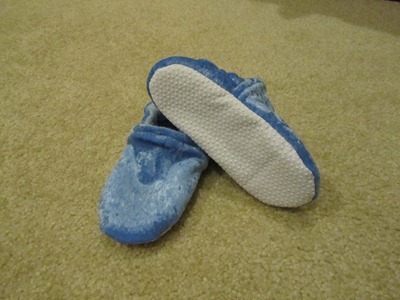
The pattern includes sizes 0-6 months all the way through 4 years. For Littles, I used the 4 years pattern, but since she has her daddy's wide feet, I cut it a little bit wider. For fabric. I used scraps of crushed panne from her Silvermist costume top for the outside toe and outside heel pieces. I used anti slip sole fabric (found on the notions wall at Joann's) for the outside sole. And for all of the inside pieces, I used light blue fleece, to make the slippers soft and warm.

I think they came out really nicely!

IMG_0024

A good shot of the anti slip sole fabric:

IMG_0025

I managed to get her to wear a long sleeve shirt as well as the slippers, but she still refused to put anything on her legs...Oh well.

IMG_0170

Monday, December 27, 2010

Cowboys pajama pants

DSC09201

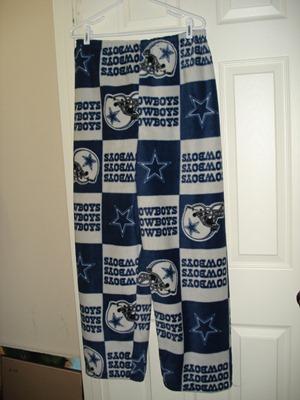
Hubby is a Dallas Cowboys fan. I am a Philadelphia Eagles fan. As you might imagine, this makes for some interesting fall Sundays in our household. But we've each learned over the years to be at least semi-supportive of the other's team. (Except for when they play each other.)

To that end, I'm always on the lookout for good deals on Cowboys fabric. At the end of last season, I picked up some Cowboys fleece in the remnants bin at Joann's. I held onto it until this season, then made fleece pajama pants for the kids. Hubby saw me making them and asked for a pair of his own, but I pointed out that the fabric is super expensive when it's not in the remnants bin! Soon afterwards, though, I was able to snag a bunch of it for 50% off, so I decided to sew it up for Hubby as a Christmas present.

I used McCall's 5770 for the pattern. I made a slight modification by cutting each leg as one big piece, so that I only had seams on the inseams, rather than cutting each leg as two pieces and having a side seam as well. I knew from experience that matching up the squares in the fabric is a little tough, so I didn't want to have to do that on the sides of the pants.

Aside from that, the pattern was really easy to sew, especially since I already had experience sewing pants for the kids. The hardest part was finding time when Hubby (who is currently at home on paternity leave with Noob) was out of the house, so that I could keep it a surprise!

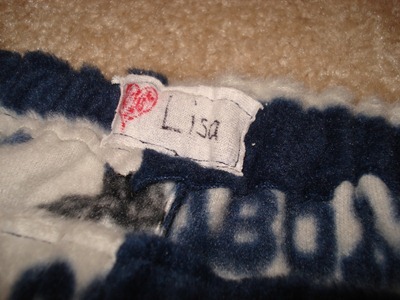
I also made my first attempt at a tag for any of the clothes I've sewed. Again, from experience with the kids' pants, I know it's hard to figure out the front from the back, so I figured this would help Hubby out, as well as serve as a reminder of just why I sewed these for him :) It's just a little piece of t-shirt fabric that I sewed in to the fabric that would become the elastic casing, before I sewed the casing itself. I used Sharpies for the writing.

DSC09199

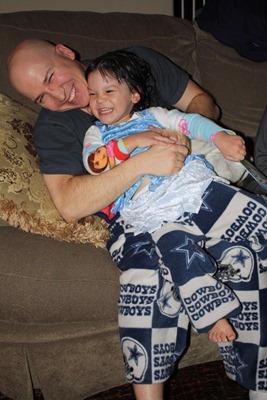
Hubby has worn the pants every day since Christmas, so I guess he likes them! Here he is with Littles in her matching pants (underneath her Silvermist costume, of course):

IMG_0164

Silvermist fairy costume

3955734958_c6baed1b6f_z

If you don't have a preschool-age girl in your life, you are probably unfamiliar with Silvermist. But everyone probably knows her good friend Tinker Bell, of Peter Pan fame. The marketing wizards at Disney apparently figured out that they could make Tinker Bell a star in her own right, and sell more stuff. So there are now movies that feature Tinker Bell. She has an entourage of fairy friends, each possessing a different talent. Silvermist is a "water fairy."

Like many other preschool-age girls, Littles adores Tinker Bell. In fact, when we went to the pumpkin patch with her preschool class back in October, out of maybe 10 girls in our group, three of them planned to be Tinker Bell for Halloween. Littles was one of them, and she insisted that I sew her costume.

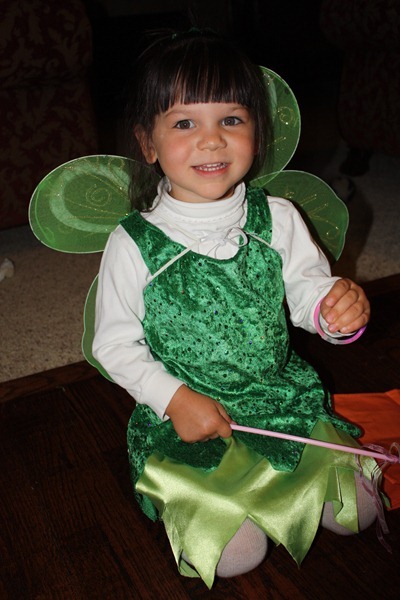
I used Butterick 4632 as the pattern. It's not as pretty as the official licensed Disney fairy pattern (Simplicity 2559 for sizes 1/2 to 4, or Simplicity 2872 for sizes 3-8), but it is very easy to sew. I didn't make the included wings; instead, I picked up green wings at Dollar Tree. Here is the finished costume:

IMG_9311

Littles loves her Tinker Bell costume, but she also requested a Silvermist costume and a Vidia costume. (Vidia is actually a bit of a villain in the Tinker Bell movies, but Littles likes her because she wears purple, which is Littles' favorite color.) So I decided to sew them for her as a Christmas present. Noob's gift ended up taking so long that I could only do one, and I chose to do Silvermist. Thankfully, this one came together much faster. It took less than 2 hours of sewing time.

DSC09197

I made the original Tinker Bell costume out of some relatively expensive "special occasion" fabric (for the top) and stretch satin (for the skirt) from Joann's. I figured out afterwards that I could use crushed panne instead, which I picked up on sale for $2.99/yard at Hancock Fabrics. Score! And it worked really well!

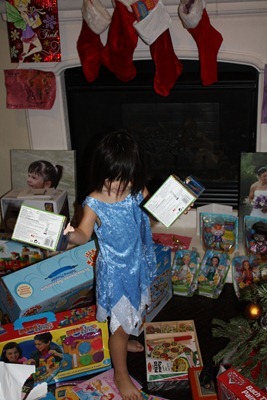
Here is Littles wading through her other presents in her new Silvermist costume on Christmas morning:

IMG_0075

I like how it turned out, for the most part. I messed up the elastic casing on the skirt, but the top covers it anyway, so it doesn't really matter. Also, the neck hole is too big for Littles, so the costume tends to slide off one of her shoulders. I had this problem with the original Tinker Bell costume and I thought it was because I had sewed the neckline incorrectly... but I did it right this time and it's still a problem. I think the size small (which is what I made) might just be a little big for her. Oh well, a safety pin in the back of the top holds it on her shoulders for now, and it gives her room to grow.

Littles could care less about the big neck hole, and has now worn this costume for three days straight :) But she has asked for blue wings. Darn, Dollar Tree only sells fairy wings around Halloween. I might have to learn how to make them myself...

Toddler soft book: Do not attempt this project :)

DSC09202

Just kidding, it wasn't that bad. But this project took significantly longer to put together than most of what I do. I usually sew after the kids are in bed, and I can finish most projects in one or two nights of dedicated sewing. This one? Took the better part of a week. It wasn't particularly hard to sew, but there were just a lot of steps.

As with the tutu, this came from one of the project idea sheets that you can pick up for free in any Joann's store. They are also available online. Here is the link.

This particular project was for a toddler soft "book" made out of fabric. Noob already has some store-purchased soft books, and they are great! They hold up to everything a baby can dish out -- chewing, pulling, folding, you name it.

The original project called for a shapes book, featuring a different shape on each page. But, well, you can buy books about shapes anywhere. Even before I started, I could tell that this project was going to take a lot of work, so I wanted to do something truly unique.

The original project suggested printing out the names of each shape onto special fabric paper that you can put into your inkjet printer. That gave me an idea: Rather than just printing words, why not print pictures as well?

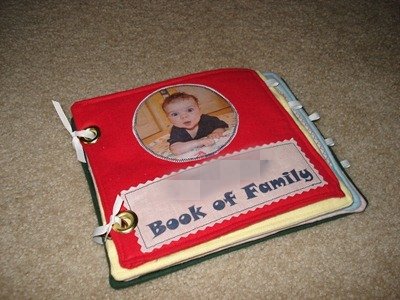
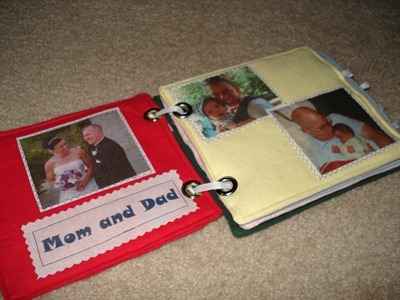
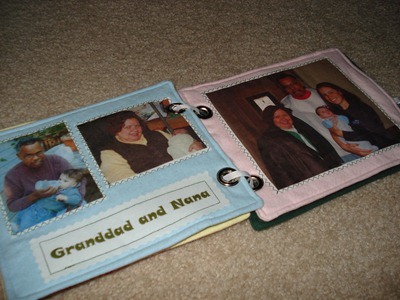
And that's how "Noob's Book of Family" was born. Each page features pictures of Noob's close family members (parents, sister, grandparents, and aunt): Here are two pages:

DSC09203

DSC09205

Here are the changes I made from the original project:

  1. Obviously, I used photos, instead of shapes.
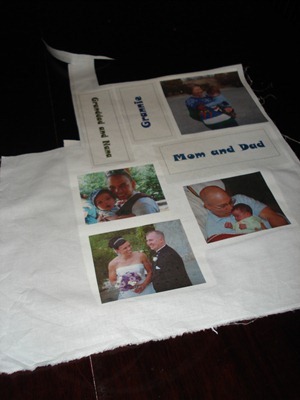
  2. Rather than using inkjet fabric paper, which allows printing directly to fabric from an inkjet printer, I used inkjet t-shirt transfer paper. Then I transferred the printed images to plain white muslin. I did this because I wasn't sure whether the inkjet fabric paper was washable -- and anything intended for use by a baby needs to be washable! This solution was also a little cheaper than the inkjet fabric paper.

    Here is a picture of the muslin with some of the pictures transferred onto it. You can also see the Heat n Bond on the back of the pictures:
    DSC09180
  3. I only made 5 pages, rather than 6. This was not intentional. I didn't read the directions carefully when I was buying fabric, and only bought five colors of flannel :) It worked out for the best, though, since 5 pages was more than enough work!
  4. I wanted each page to make that "crinkly" noise, because Noob loves toys that do that. To accomplish this, I added two pieces of cellophane for each page, I got the cellophane at Joann's -- it's designed for use in wrapping gift baskets. I cut the cellophane to be the same size as the flannel/batting for each page, and inserted it in between the batting and one of the pieces of flannel.

A couple of tips that I want to remember if I'm ever crazy enough to do something like this again :)

  • Leave about 1" on the border of each page for the grommets. I centered the pictures on each page, and so the grommets ended up going through some of the pictures. You can see it in the "Mom and Dad" sign on the red page above, as well as on the picture of Noob and me on the left of the yellow page. It doesn't look too bad, but it would have been nice to avoid it.
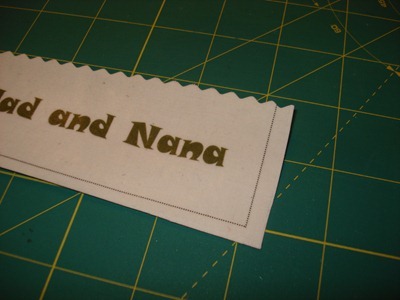
  • I used a pinking rotary cutter to cut out the name signs, and it was really hard to cut straight. For the last few that I did, I added a dotted border in Publisher before I printed, and then cut along the dotted border. That helped a lot. Here's a close up of one in progress, showing the dotted border:
    DSC09182
  • I had a really hard time getting the pictures lined up straight on the page, relative to the seams that I ended up sewing. You can see how crooked the "Book of Family" sign is on the cover! I think it would have helped to draw the seam lines on the flannel, line up the pictures relative to those lines, and then sew along those lines.
  • The instructions call for half a yard of Warm and Natural batting. I think Joann's just wants to sell more batting :) You only need 8" -- the batting for all the pages can easily fit into the width of batting by-the-yard, with enough left over in case you mess up.
  • I had to do a lot of ironing! Ironing to transfer pictures to the muslin, then ironing to bond the Heat n Bond to the muslin, then ironing to fuse the Heat n Bond + muslin to the flannel. Eventually, I figured out the easiest way to do this:
    1. Transfer the pictures to the muslin.
    2. Before peeling the paper off the picture transfer, bond the Heat n Bond to the muslin. I used a big piece of Heat n Bond to bond to a bunch of pictures all at once, and that worked well.
    3. Wait for everything to cool off.
    4. Remove the transfer paper from the muslin. Save it!
    5. Cut out the shape.
    6. Remove the paper from the Heat n Bond. Place the picture in the desired spot on the flannel. Place the original transfer paper on top of the picture. (This keeps it from sticking to the iron!) Iron to fuse the picture to the flannel. Remove the original transfer paper from the picture.
  • Don't do this project on a deadline! e.g. Christmas :) I'm pretty sure Hubby wanted to kill me by Christmas Eve, because I left this project to the last minute and had to spend soooooooo much time working on it, rather than helping him with Christmas preparations! It's not hard, but it does take a lot of time, so plan accordingly.
  • This would actually be a really good "travel project" (a project to do while on the road), because you don't need a sewing machine for a lot of it. You can get all the pictures done and pages assembled with just scissors and an iron. Once that is done, the sewing goes pretty quickly.

Despite this being a big pain to put together, I'm really pleased with the way it turned out. Of course, Noob is much more interested in stealing his big sister's Christmas presents than playing with his, this one included. Sigh. But hopefully he'll appreciate it in the months/years to come!

DSC09207
(Back cover of the book :)

Sunday, December 26, 2010

Fleece sleep sack (again)

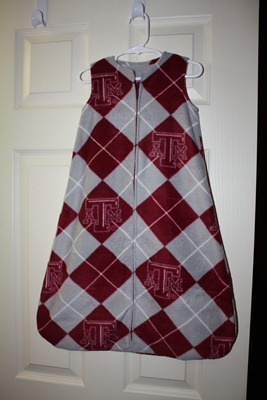
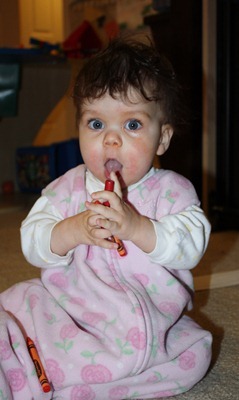
The nights are getting chilly here, and the fleece sleep sack that I sewed for Noob a few weeks ago is working out beautifully. On a recent trip to Joann's, I saw some Texas A&M University fleece in the remnant bin. One of our friends is a proud Aggie and she has a baby boy just a few months younger than Noob, so I got the idea to sew another sleep sack for them.

IMG_9855

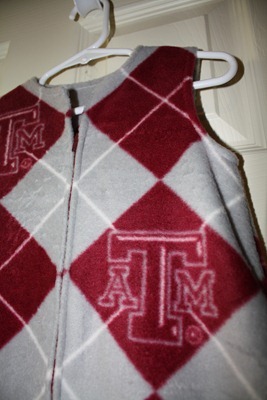
It took some careful planning to line up the plaid correctly across the zipper in the front, but I think I did a pretty decent job. This shot also shows how the zipper ends about an inch or two below the neckline, so that it doesn't jab into the baby's throat:

IMG_9857

Hopefully this keeps little D warm this winter! I plan to sew up a few more of these for Noob, because they are super easy to sew and handy to have around.

Tutu

DSC09175

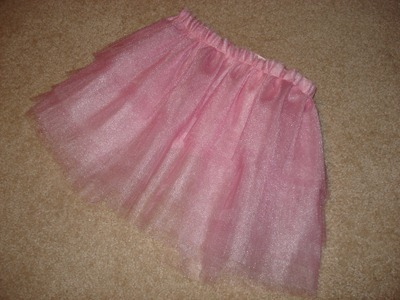
Littles has been taking dance classes once a week for the past year. She loves them! She does ballet and just started tap last month. When Hubby took her to the dance store to get tap shoes, she spied some tutus... and has been asking for one ever since. So I decided to sew one up for her as an early Christmas present.

I had found some tutu sewing directions at Joann's a while back -- they have little sheets in the store with interesting project suggestions on them. I used that as a starting point, but ended up modifying it slightly to suit my preferences. I should have taken pictures as I went to do this post tutorial-style, but, well, I didn't. So I'll try to describe in words instead.

I used shiny tulle from Joann's in two different shades of pink. I cut strips lengthwise, from selvage to selvage, that were 12", 14", 20", and 24". (The original directions called for another strip 28" wide, but I thought that might make it a little long for Littles.) So, with the two different colors, I ended up with eight pieces of tulle.

I folded them in half, so now I had pieces that were 6", 7", 10", and 12" in height. Then I layered them from tallest to shortest, alternating the two colors. This was a huge pain! Tulle is not the easiest material to work with. I ended up taking one of the 12" tall folded pieces and laying it down and pinning it. Then I took the other 12" tall folded piece, laid it carefully on top, and made sure that the fold was reasonably straight. Then I took out the pins on the first piece to pin through both pieces. And so on, until I had all the pieces layered.

I put in some more pins to hold the layers together and did a basting seam about an inch from the fold. A basting seam is just a very loose seam that is designed to hold the pieces together temporarily. On my machine, I set the thread tension to 0 (as loose as possible) and the stitch length to 4 (as long as possible) to baste. It was a little hard to sew and so my basting seam ended up kinda crooked, but that was fine, since it was only temporary.

Then I gathered the tulle pieces to match Littles' waist. This was easy to do with the basting seam. I just pulled on one of the pieces of thread and that gathered the fabric right up. I kept pulling until it was the right length, then redistributed the tulle evenly along the basting seam.

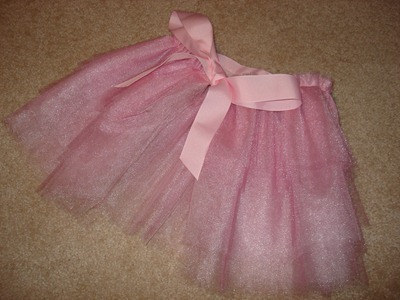
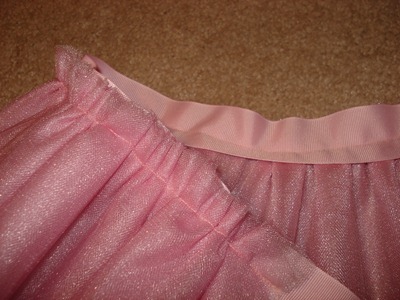
At that point, it was time to add a ribbon for the waist. I used 2 yards of 1.5" grosgrain ribbon. I centered the tulle on the ribbon (since the ribbon was much longer than the gathered tulle) and pinned down the edges of the tulle. Then I added a bunch more pins in between to keep it in the right place. Finally, I sewed a seam down the middle of the ribbon. The original instructions called for folding the ribbon over the gathered tulle and sewing it again, but I liked the way it looked with the ribbon at the back. To finish it off, I removed the original basting seam.

It might sound complicated, but it was pretty easy, aside from working with the tulle! Here's the finished product...

From the back:
DSC09176

Close up showing the gathered tulle and how it is sewed to the ribbon:
DSC09178

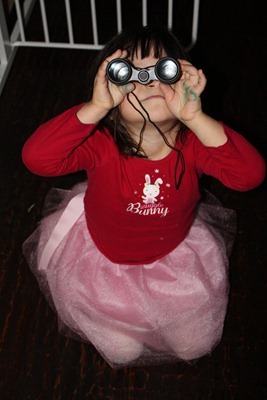
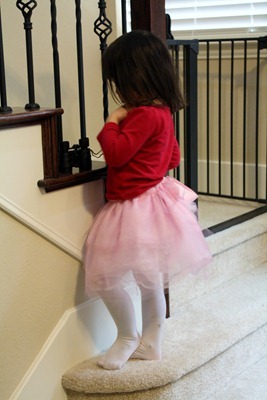
Littles doesn't usually have dance class during school breaks, but she had a special make-up class this Thursday, so I gave her the tutu in time to wear it for class. She didn't take it off the rest of the day :)
IMG_9990

IMG_9999

I don't love the way it turned out. I made the waist a little too big. And it's very hard to tie the ribbon tight enough so that there isn't a big gaping hole on the back. I may experiment with adding some elastic on the waist to see if I can help with both problems. But certainly, it works well enough for now!
Friday, December 10, 2010

Fleece sleep sack: I finally finished a project!
IMG_9779

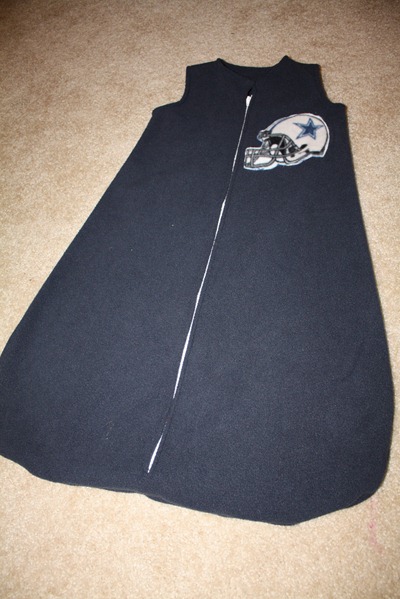
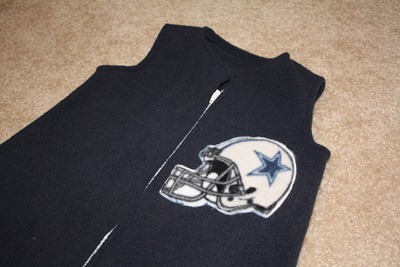
This is one of the projects I mentioned that I've been working on in my last post. I finally finished! It's a fleece sleep sack to help keep Noob warm this winter.

The pattern is McCall's 4236. It's great! Just two pattern pieces to cut out, and then it's pretty easy to sew. This was one of my first attempts sewing a zipper, as well as finished armholes/neckholes -- both are little tricky at first, but I'm getting the hang of them.

This is a size medium. I compared it to a size medium Halo SleepSack, and it appears to be practically the same size/shape.

I made it out of navy fleece just because that was the first piece of fleece I pulled out of my stash that had enough yardage :) But as I started sewing it up, I thought it might look cute with some Dallas Cowboys decoration on it. The football helmet applique is from some Dallas Cowboys fleece that I've been using to make pajama pants for the kids. It was easy to sew on, and I think it makes the sleep sack look less plain.

IMG_9780

I finished this after Noob went to sleep tonight, so he'll have to wait till tomorrow to wear it. But it definitely suits him better than the hand-me-down sleep sack he's been wearing :)

IMG_9776

Thursday, December 9, 2010

Pajama pants: Instant gratification!

I've been working on a couple of new projects over the last week or so, but I haven't actually finished any of them! I'm getting close, so I'll show them off soon.

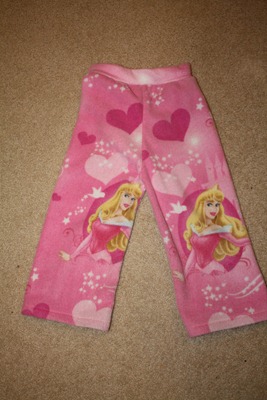
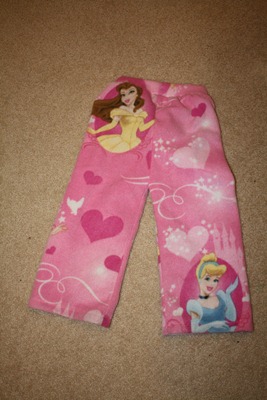
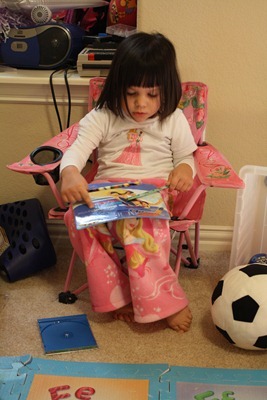
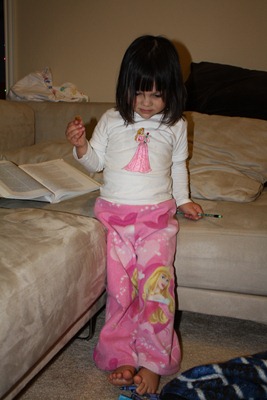
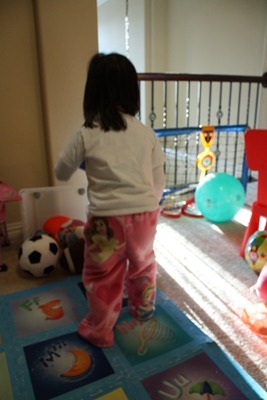
In the meantime, last night, I whipped up a pair of pajama pants for a Christmas pajama party at Littles' preschool, using some Disney Princess fleece I bought a while ago. I actually didn't realize that the party was today until about 10:30 last night! So I used the free Katrina longies pattern, which I've sewed up about a zillion times before, because I knew I could do it quickly. Sure enough, I was done by midnight -- and I took a conference call for work in there (with a colleague in India). Not a bad night's work.

The end result... I'm not wild about the front. I don't really like how the pattern is almost (but not quite) the same on both legs:

IMG_9771

The back turned out better, but I don't know why I cut Cinderella off so much, because I really didn't need to! Oh well. That's what happens when you work fast.

IMG_9772

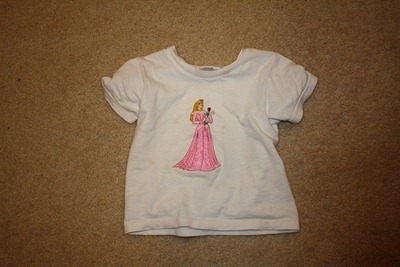
Over the summer, I had made some fleece shorties for Littles to wear as pajama bottoms, using the same pattern and the same fleece. I also made a coordinating Sleeping Beauty shirt, using a Hanes toddler underwear shirt (size 2T/3T) and some iron-on embroidery that I got on clearance at Joann's:

IMG_9773

It ended up going nicely with the new pajama pants! I just put a long-sleeve white t-shirt underneath so she wouldn't be too cold.

Littles wasn't really cooperating for pictures, so these are the best action shots I could get:

IMG_9693

IMG_9770

The pants are size extra large, with about a 12" inseam (hemmed). You can see in this next picture that they're pretty big on Littles, especially when she wears them over underwear like she did today. (She is daytime potty trained.) But she still wears a diaper overnight, so I like to make sure her pajama pants have plenty of room for a diaper as well:

IMG_9695

Instant gratification! Now back to work on my other projects...

Monday, December 6, 2010

Diaper snap conversions

DSC09064

I did quite a bit of traveling in November, between the Thanksgiving holiday and a few business trips. Obviously, my sewing machine doesn't come with me when I travel, so I try to find little projects that don't require a sewing machine that I can do while I'm on the road. Right now, I'm mostly doing snap conversions for some of our cloth diapers.

The diapers I'm converting are all BumGenius 3.0 one-size pockets. I purchased them during a sale at Cotton Babies a few months ago. They were charging just $2 for "well loved" 3.0 pockets with free shipping, so even though we have plenty of BumGenius's in rotation, I couldn't resist the price! Overall, the diapers were in much better shape than I anticipated. In fact, two of them just had some diaper cream staining that required some scrubbing with some Dawn, and then they went straight into our rotation! Given that these diapers retail for $18 each, I would've been pleased to get just those two diapers for the $20 I spent!

But... I got eight other diapers as well! They could use some work, but since we do have plenty of diapers, I'm in no particular rush to get it done. Some of them should be fine as soon as I replace the velcro tabs and/or laundry tabs. I actually like velcro diapers a lot (they're so easy to use, especially for babysitters and others who aren't used to cloth diapers), so I prefer to leave the diapers as velcro whenever possible. But four of them had a pretty icky front velcro strip, and from what I've heard, those are a real pain to replace. So I decided to just go ahead and take all the velcro off and convert them to snaps.

Snap conversions are a little tedious, but very easy. I have snap pliers, which can be purchased from KAM Snaps for around $30. I got mine for my birthday! They are a nifty thing to have around for all kinds of projects, not just diapers.

The KAM Snaps site also has tutorials for doing diaper conversions. Pretty much all you need is:

  1. Diaper to convert
  2. Snap pliers
  3. Snaps
  4. Awl (for poking holes to put the snaps through)
  5. Template for snap placement (there's a premade one here, which is what I used, or you can make your own)
  6. Pen/pencil/marker (I like to steal Littles' washable markers, since I know the marks will wash out!)

It all fits easily in a gallon size Ziploc bag, so it's perfect for traveling!

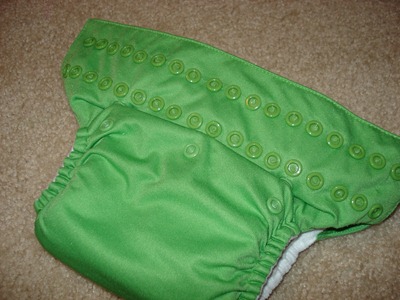
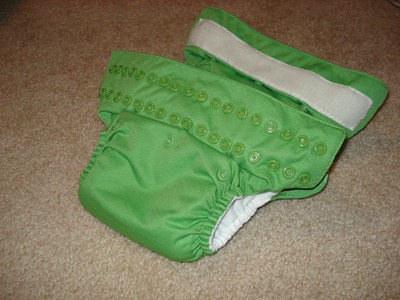
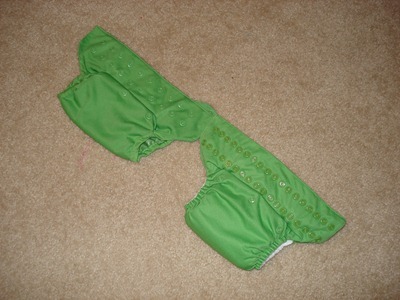
The green diaper shown above is the one that I converted over Thanksgiving vacation! Here it is with a 3.0 pocket with the original velcro:

DSC09074

One of my pet peeves about snapping diapers is that my kids always seem to be in between sets of snaps. To hopefully avoid that problem, I put a ton of snaps on. Hubby saw me working on it and said, "Did you put, like, three times the normal number of snaps on?" Well, not quite :) But close! There are 18 snaps in each row on my diaper, compared to just 10 snaps in each row on BumGenius 4.0's, Flips, etc. Here's my converted diaper (on the bottom) next to a Flip cover (on top):

DSC09063

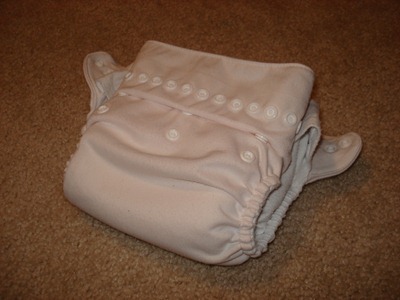
This was actually the second diaper I converted. I did one at home a few weeks ago, too. On this one, I just did one row of snaps. There are 16 snaps in the row. I think I might add one more on the outside, but right now, Noob is small enough that he doesn't need them.

DSC09076

I figure I'll try both of these diapers out for a while and see which snap arrangement I like better.

Here are some action shots! Noob is 10 months old and probably around 18 lbs.

DSC09093

DSC09103

The beginning

I got my start as a sewer a little over a year ago.

I was using cloth diapers on my daughter, Littles (age 2 at the time), and had really started to love wool longies. Longies are pants that double as cloth diaper covers. They're trimmer than most cloth diaper options, they're more absorbent, and they're easy to get on a toddler who doesn't like to sit still for diaper changes! There's only one problem: They can be expensive! One of my main reasons for using cloth diapers is to save money, so spending $20 or more on a pair of longies just wasn't going to happen.

But then I heard about people sewing longies out of old wool sweaters, purchased for just a few dollars at a thrift store. I even found a free longies pattern online. Now we're talking. There was only one problem: I didn't know how to sew. And I'm not a crafty person. At. All. It seemed easy enough, but was I getting in over my head?

Undaunted, I asked around to see if any of my friends had a sewing machine, in hopes that I could give sewing a try without investing any money. Sure enough, one of my friends was happy to let me borrow hers. One night, I put my daughter to bed and then sat down with the borrowed sewing machine (and its manual), a free pattern for wool soakers (diaper covers), and an old wool sweater of mine that had a hole in it. A few hours later, I had this:

Photobucket

Not the prettiest thing, but it worked beautifully as a cover for Littles' overnight diapers until she outgrew it about six months later!

Encouraged, I hit up my favorite local thrift store on their half price day, walked away with an armload of sweaters for less than $10... and a few nights later, I had a couple of pairs of longies for Littles.

Who then promptly potty trained. Oh well.

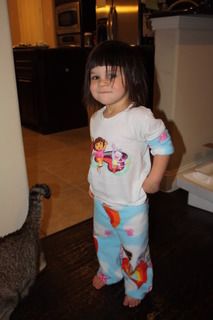
But I did have another baby on the way, so I sewed up some longies for him. And when I got a good deal on Dora the Explorer fleece, I made some pajamas for Dora-obsessed Littles as a Christmas present:

Photobucket

The friend who originally lent me the sewing machine decided to get a new one, so she was happy to sell her old one to me for cheap. I was on my way.

After Noob's arrival in late January, I was too busy to sew for quite a while. But I've slowly gotten back into it, and I've found more and more fun projects to work on. I love it!

I decided to start a blog to share what I'm doing, and hopefully encourage other rookie sewers to jump on in. The water is fine!